

Why would you bother with seed saving, one might ask. Well, for starters, I spent over $80 on seeds just this year (that’s not counting seedlings, tubers, etc.)… Also, it is interesting to see something go full circle: seed-plant-fruit-seed. Finally, after a couple seasons of successive seed saving you can proudly proclaim that you have cultivated your own heirloom varieties, best suited for your own growing conditions. Obviously, these are not the only reasons out there to save your own seeds, I just picked some of my favorites.
Marigolds are probably the easiest flowers to collect seeds from. The flowers form into pods that are full of seeds. All you need to do is break the pod apart and tease out the seeds!

The only potential pitfall for balcony gardeners like myself is that not all seeds may be fertilized, since pollinators don’t make it to balcony gardens as often as they do the in-ground gardens. Fear not, however, because it is very easy to distinguish the good seeds from the bad ones: pick the fattest blackest ones.

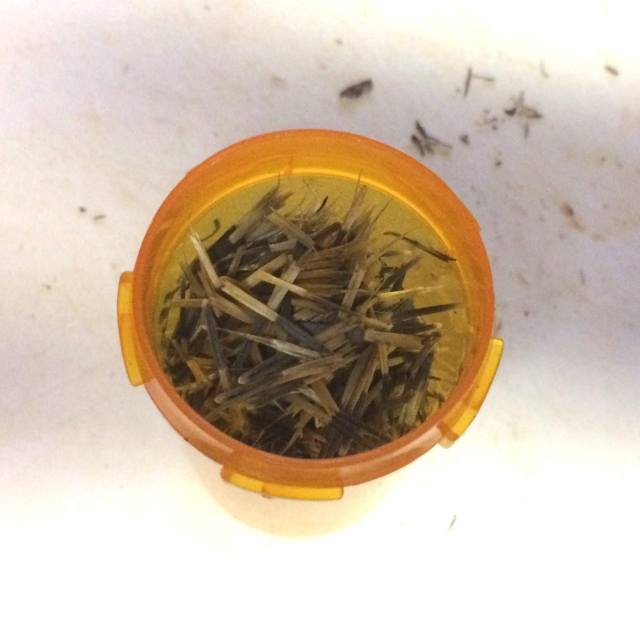
At the moment I store my seeds in pharmacy pill containers (I happen to have a large supply), which are semi-transparent, so you can see what’s inside without opening. Cylinder is an inefficient shape for a storage container, so I’m trying to come up with a better seed storage system.
Calendula are also easy to collect seeds from – just pick the claw-shaped seeds from the dried-out flowers. I don’t have a good system for picking the fertile seeds for this one yet, though. But I will find out in spring!

Peppers seem to be made for easy seed harvesting: just cut one open – and voila!

Separate seeds from the pulp and dry them out in a dish – and that’s all!

Tomatoes and eggplants are a bit trickier, but only because their seeds are lodged in the juicy pulp. I’m not saving any tomato seeds this year, but I do have a couple of eggplant varieties I’d like to keep going. I’m also going to find out which fruit ripeness is best to achieve a good germination rate for resulting seeds: one eggplant is just right, and another is old and starting to rot. I figured this is what happens in nature, and thus seeds from a rotten eggplant may sprout better.
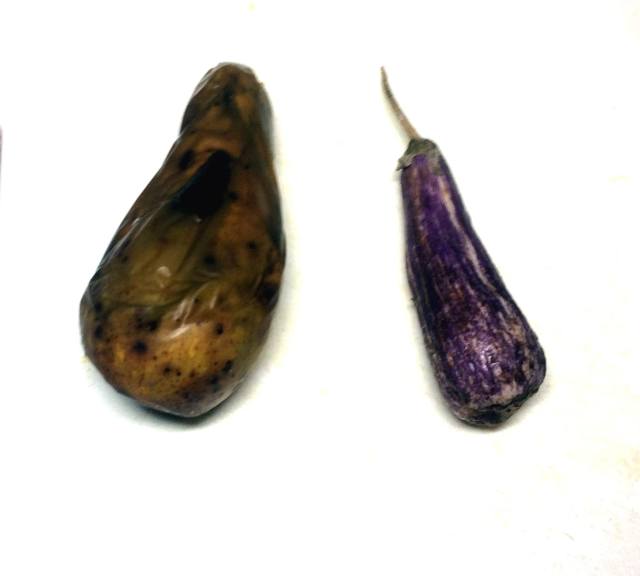
When I cut the two fruit (yes, eggplant technically are fruit, as are peppers, tomatoes, cucumbers, zucchinis, and other so called vegetables), I found out that I was right, but a bit too right. As you see in the picture below, seeds in the rotten eggplant have already started sprouting!

I decided to use the fermentation method frequently recommended for tomatoes and eggplants, because it made sense to me, biologically speaking. The idea, once again, is that in nature the fruit goes through stages of decomposition and fermentation in fall and winter before the seeds get a chance at sprouting in spring.
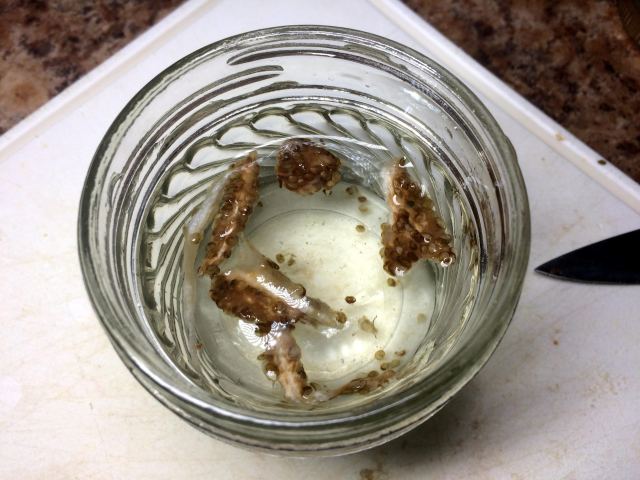
The first step is to soak the seeds (with the shreds of pulp attached to them) in mater for a couple days. A mason jar covered with a piece of cloth or paper towel makes a great container. And, you can write the plant name on the paper towel.

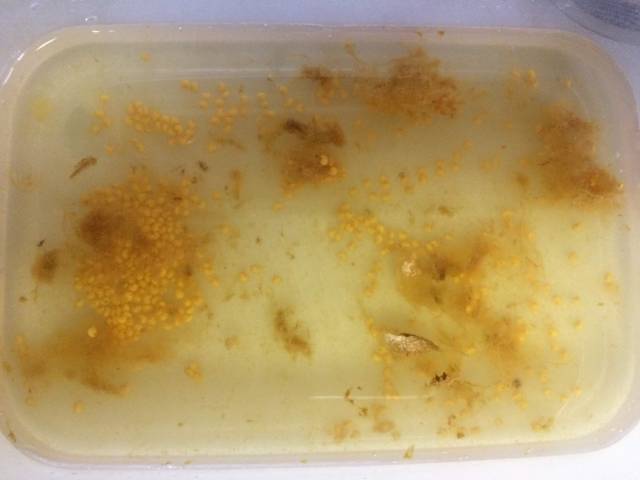
After several days the liquid will start to get bubbly and you’ll see a rim of mold on the surface – that’s good, it means fermentation is in progress.

Next step is to rinse the seeds in clean water, separating the remaining chunks of pulp.
After the wash, the seeds go into a strainer for a final rinse.

Finally the seeds go back onto the same paper towel or fabric that has the variety name on it, to dry.

And now comes the hardest part: waiting till spring to try those seeds out!

I am trying to save the seeds of every kind of vegetable I grow, though not all of them co-operate! I did not know about the fermentation method, thanks for the information.
LikeLiked by 1 person
You’re welcome, I hope you find it useful! I don’t think all plants would benefit from it though, probably just the ones with juicy pulp, like tomatoes and eggplant
LikeLike
So exciting to see the next generation. And you are right, the wait for spring sowing is agonising! I go to sleep dreaming of what my plot might look like…
LikeLiked by 1 person